Respiratory distress can be life-threatening if not identified early. Using a stethoscope is one of the most effective methods for evaluating lung health. This guide provides step-by-step instructions, including auscultation sites of lungs, examples, and practical tips to help you perform a thorough respiratory assessment.
What Is a Respiratory Assessment?
A respiratory assessment evaluates the health of the lungs and breathing efficiency. It involves observation, palpation, and auscultation of lung sounds using a stethoscope. This process helps detect abnormalities like wheezing, crackles, or reduced airflow, which may indicate conditions like asthma, pneumonia, or chronic obstructive pulmonary disease (COPD).
Healthcare professionals, including nurses and physiotherapists, rely on respiratory assessments to diagnose and monitor lung conditions.
Why Use a Stethoscope for Respiratory Assessment?
The stethoscope allows you to hear internal lung sounds, which provide critical insights into a patient’s respiratory health. Early detection of abnormalities can guide treatment and prevent complications. For example, identifying crackles may indicate fluid in the lungs, which is common in pneumonia, while wheezing suggests airway constriction.
Steps to Conduct a Respiratory Assessment
1. Preparation
- Explain the procedure to the patient to reduce anxiety.
- Ensure the environment is quiet for better sound clarity.
- Have the patient sit upright to expand the chest for better auscultation.
2. Visual Inspection
- Observe the chest for symmetry during breathing.
- Look for signs of labored breathing, cyanosis (bluish skin), or nasal flaring.
3. Palpation
- Feel the chest for any abnormal vibrations (tactile fremitus).
- Check for symmetry in chest expansion during deep breaths.
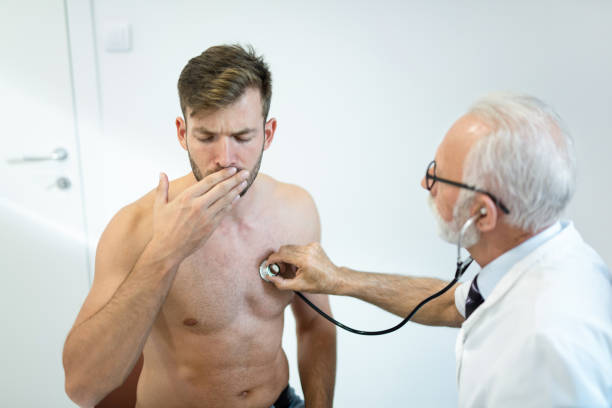
4. Auscultation
Auscultation is the most critical part of the respiratory assessment. Follow these steps:
- Place the stethoscope diaphragm on specific auscultation sites of the lungs (see below).
- Instruct the patient to take deep breaths through the mouth.
- Listen to one full breath cycle (inspiration and expiration) at each site.
- Compare sounds bilaterally to detect differences.
Auscultation Sites of Lungs
Proper placement of the stethoscope is crucial for accurate lung sound evaluation. Below are the key sites for auscultation:
| Location | Site Description | Purpose |
| Anterior Chest | Upper and middle lung fields, near the sternum. | Detect airflow in upper lungs. |
| Posterior Chest | Between the scapulae and lower back areas. | Check for lower lung abnormalities. |
| Lateral Chest | Sides of the chest, just below the armpits. | Assess lung bases and peripheral airways. |
Tips for Accurate Auscultation:
- Avoid listening through clothing; place the stethoscope directly on the skin.
- Move systematically, starting at the top and working downward.
- Note differences in volume, pitch, or timing between the lungs.
Common Lung Sounds and Their Significance
| Sound Type | Description | Indicates |
| Normal (Vesicular) | Soft, low-pitched sounds. | Healthy lungs. |
| Crackles (Rales) | Popping or bubbling sounds. | Fluid in the lungs (e.g., pneumonia). |
| Wheezing | High-pitched whistling sound. | Narrowed airways (e.g., asthma, COPD). |
| Rhonchi | Low-pitched, snoring-like sounds. | Mucus or obstruction in larger airways. |
| Stridor | High-pitched, harsh sound. | Upper airway obstruction. |
| Absent Sounds | No detectable airflow. | Collapsed lung or severe blockage. |
Respiratory Assessment in Physiotherapy and Nursing
Importance in Physiotherapy
In physiotherapy respiratory assessment, identifying lung issues guides interventions like breathing exercises or airway clearance techniques. For example, crackles detected during auscultation may prompt physiotherapists to use techniques like chest physiotherapy or postural drainage.
Importance in Nursing
In respiratory assessment nursing, nurses use findings to administer oxygen, and medications, or initiate emergency protocols. Early detection of wheezing or absent breath sounds can prevent critical respiratory failure.

Step-by-Step Example: Respiratory Assessment Procedure
- Inspection: Check for visible signs of distress like fast breathing or chest retractions.
- Palpation: Feel for vibrations while the patient says “99” to detect abnormal airflow.
- Auscultation: Use the stethoscope to listen to lung sounds at key sites.
Here’s a sample respiratory assessment example:
- Start at the anterior chest and listen to the upper lungs.
- Move to the posterior chest to check the lower lobes.
- Finish at the lateral chest for peripheral airways.
- Document findings, noting any abnormal sounds.
Comparison of Respiratory Assessment Methods
| Method | Tools Used | Key Focus | When to Use |
| Visual Inspection | Eyes only | Detect physical signs of distress. | Always performed first. |
| Palpation | Hands | Assess chest vibrations and symmetry. | When abnormalities are suspected. |
| Auscultation | Stethoscope | Evaluate lung sounds. | Critical for detailed diagnosis. |
Tips for Better Results
- Choose a quiet environment to minimize noise interference.
- Encourage deep breathing to amplify lung sounds.
- Practice regularly to improve your ability to distinguish sounds.
Conclusion: Mastering Respiratory Assessment
Assessing respiratory distress with a stethoscope is an essential skill. By following the correct respiratory assessment procedure and using the stethoscope at the correct auscultation sites of the lungs, you can detect abnormalities early. Whether you’re in nursing, physiotherapy, or general healthcare, these skills ensure accurate diagnoses and better patient outcomes.
